Welcome Enjoy Tutorials

Liked us?

Showing posts with label tutorial. Show all posts

Friday, June 7, 2013

Slider De Imagenes Con Descripcion Para Blog De Blogger


 En este artículo te explicare  cómo agregar una descripción desplegable de la imagen para blogger. Puede añadir este widget a la barra lateral.
Si tienes cualquier mensaje especial lo puede enlazar en su mensaje con este widget.Este mensaje deslizable de las imagenes se hizo utilizando CSS y HTML.Usted puede cambiar las imágenes y los vínculo a su gusto.


 Ejemplo:Ponga el cursor del raton sobre la imagen para activarlo.
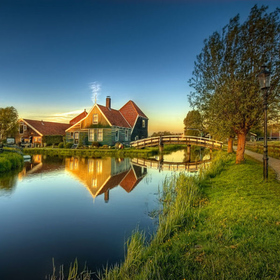

Food

Lorem Ipsum

Lorem ipsum dolor sit amet, consectetuer adipiscing elit, sed diam nonummy...
More

Siga los sigientes pasos para agregarlo a su blog.
 1. Entrar a la cuenta de blogger y Click menu desplegable.

2. A continuación, seleccione "Diseño", como a continuación.

3. Haga clic en Agregar un Gadget y seleccione "HTML / Javascript


 4. Pegar el siguiente codigo.

<style>
.image-box {
  width:280px;height:280px;overflow:hidden;background-color:white;
  border:1px solid #ccc;float:left;margin:1px 1px;
  font:normal normal 12px/1.4 Segoe,"Segoe UI",Arial,Sans-Serif;
  color:#333;
}
.image-container,
.image-details {height:280px;border:5px solid white;background-color:#ffc;
  transition:margin-top .4s ease-out .4s;
}
.image-container img {
  width:280px;height:280px;padding:0 0;margin:0 0;border:none;outline:none;max-width:none;
  max-height:none;
  background-color:black;
}
.image-details h4,
.image-details p {
  margin:0 0 .2em;padding:0 0;height:70px;
}
.image-details h4 {
  font-size:120%;height:auto;
}
.image-details .details {
  padding:10px 12px;overflow:hidden;
}

.image-details .more {
  color:white;text-decoration:none;display:block;
  text-align:center;font-weight:bold;background-color:#f9a;height:26px;line-height:26px;margin:10px 0 0;
}

.image-box:hover {border-color:#bbb; width:280px;
  height:280px;}
.image-box:hover .image-container {margin-top:-160px}
.image-details .more:hover {background-color:black}
</style>

<div class="image-box-wrapper" id="image-box-wrapper">
 <div class="image-box">
  <div class="image-container">
   <img width="280" height="280" src="https://blogger.googleusercontent.com/img/b/R29vZ2xl/AVvXsEjiN-iJxRUurTntWm-hCWQjmrD7yMxEfsLAfrMmsIZ7FgJsXCPv3vLRMc-q5ifvSk063fKGFD-uy6rwjdUu0R0lbojSWGG43SWM9uT5urAcMD1PvVwxg2N1jgWJHCGeSObitTLrVotcjfc/s1600/3.jpg" alt="Food">
  </div>
  <div class="image-details">
   <div class="details">
    <h4>Lorem Ipsum</h4>
    <p>Lorem ipsum dolor sit amet, consectetuer adipiscing elit, sed diam nonummy...</p>
    <p><a class="more" href="Post Link ">More</a></p>
   </div>
  </div>
 </div>
 

 <div style="clear:both;"></div>

</div>

7. Ahora Guarda HTML/Javascript'.

  Listo.

Thursday, May 30, 2013

Change the Navigation links for the Title Post On Blogger

The navigation links are listed at the end of the entrance and say: Check latest Post, Post Older, although very useful, would be more useful instead of appearing these links appear the title of the post, this will undoubtedly attract more visitors.

This is just what I'm going to teach today, as changing these links and put in place the title of the Post.


Before:


 After:


To add this trick to your blog, go to Template, Edit HTML and paste before </ head> the following:


<script src="//ajax.googleapis.com/ajax/libs/jquery/2.0.0/jquery.min.js"></script>


Now go to Design, Add Gadget, and HTML / JavaScript paste the following:


 <script type="text/javascript">
$(document).ready(function(){
var newerLink = $("a.blog-pager-newer-link").attr("href");
$("a.blog-pager-newer-link").load(newerLink+" .post-title:first", function() {
var newerLinkTitle = $("a.blog-pager-newer-link:first").text();
$("a.blog-pager-newer-link").text("<< " + newerLinkTitle);
});
var olderLink = $("a.blog-pager-older-link").attr("href");
$("a.blog-pager-older-link").load(olderLink+" .post-title:first", function() {
var olderLinkTitle = $("a.blog-pager-older-link").text();
$("a.blog-pager-older-link").text(olderLinkTitle + " >>");//rgt
});
});
</script><style type="text/css">
#blog-pager{font-family: Arial,helvetica,sans-serif;font-size: 14px;}#blog-pager-newer-link {font-size:85%;width:200px;text-align:left;}#blog-pager-older-link {font-size:85%;width:200px;text-align:right;}</style>


With this last step ended the trick, and you've added this great trick to your blog
Enhanced by Zemanta

Thursday, May 2, 2013

How Place a Linkedin Buton In Each Post

LinkedIn
LinkedIn (Photo credit: Christopher S. Penn)
With this post I want to break the ice and initiate us into another social network, it is Linkedin. It is oriented to formalize a network professional and currently has over 135 million registered users in over 200 countries.
This new button will allow who we visit share the post with your professional network on Linkedin.

You probably already know this network, I from here I invite you to take a step further and appreciates the opportunity to create your own profile on Linkedin where you can enlist your resume, places I've worked and ultimately surround yourself with possible professional contacts to find new jobs and career opportunities.

Steps to place the button "Linkedin" on each blog

    Step 1. Access the HTML editor
        Go to "Template Tab"
        Make a backup copy of the template by clicking "Backup"
        Click on the "Format Template"
     
    Step 2. Find the following code in your template:
        Browser Use the form by pressing Ctrl F or Ctrl B (Mac ⌘ ⌘ F or B) and look for this text:
            .To place the button after the Post: post-footer-line post-footer-line-1
            .To place the button on the header of the post: post-header-line

    Step 3. Copy the following code Linkedin Button


    src='http://platform.linkedin.com/in.js' <script type='text/javascript'/>

    expr:data-url='data:post.canonicalUrl' data-counter='right' <script type='IN/Share'/>

    Step 4Paste the code just below the line found in Step 2.
    Step 5. Save the template and view the blog


For more information on this button and its variants refer to the official website Linkedin. In my case I chose the one with the counter clockwise. If you prefer to change the counter above the highlighted in red with the word top.

You may like me you take a surprise that some of your post already been shared on this network ... thanks!

We also recommend placing the button "Like Facebook" button "Google+" and button "Twitter"

Wednesday, May 1, 2013

Bing's Webmaster Tools

Image representing Bing as depicted in CrunchBase
Image via CrunchBase
Like Google, Microsoft also has its own specific tools for webmaster. The truth is that almost a month after publishing the first post of ciudadblogger.info, indexing the same in Bing (Microsoft's search engine) is extremely poor, so try the tools proposed by Microsoft.

The first thing we do is to know the comparison of our site in the two search engines, it will use this tool bingle.nu which returns the search result in Bing and Google search engine simultaneously.

There are two ways to submit your site to Bing
. The first is to use this simple form, where you enter the corresponding url and ready.

The second and most recommended method is using the Microsoft Webmaster Tools

Step 1. - Access to tools for Microsoft
Step 2. - Click on the "Sign in to use webmaster tool" (identification)
Step 3. - You must use a Windows Live ID (Hotmail)
Step 4. - Once inside, add the site indicating the URL of your blog
Step 5. - You should check it, ideally using HTML code for the HEAD section of the Blog: To insert this verification code, do the following:

    Go to the Template tab and click on Edit HTML button
    Search using Ctrl F or Ctrl B this line in the code: <b:skin> <! [CDATA [/ *
    Paste the code snippet you should get Bing tools just before the line you found in the previous step
    Save the template

Now and track expected within a week.

In this post I have explained the procedure for the case of Bing. In subsequent posts, we will deepen more. The truth is, that both criteria idexación search engines are not the same, although Google seems to "reward" blogs, not so with Bing. On the other hand we see that Google indexes each page, while Bing only follow the main page while using the free domain gives you Blogger, ie. Blogspot.com
Enhanced by Zemanta

Botones Isometricos de Social Media


Barra Lateral Fija