Welcome Enjoy Tutorials

Liked us?

Showing posts with label Facebook. Show all posts

Tuesday, May 7, 2013

How to Create A Business Fan Page On Facebook

It is true that Facebook is a temptation for anyone, even for a freelancer or SME, go if it is ... more than 500 million registered users, of which about 14 million live in Spain or in other words 29% of Spanish population has a Facebook profile (data from May 2011).

The other day a friend told me ... Hey! That we are on Facebook!, Referring to his store. I know that behind this initiative no marketing plan or goals, or anything like that. The step has been taken, whatever the trigger that prompted him to do so, the company of my friend is now on Facebook. Right now this is what counts, period.

Come if you like to go over some points that are essential to understand before taking this step.

    Do not mistake one profile with a Fan Page (Fan Pages).
    The Facebook Fan Pages are created for:
        Place or Local Business
        Company, organization or institution
        Brand or Product
        Artist, band or public figure
        Entertainment
        Cause or Community
    The profile is for people and aims to find friends, share photos of parties and others. Used to find out what your friends want you to find out and why not say, to gossip a little.
    The High-Profile form ie a person, ask date of birth, name, sex ... this is not data specific to a brand or company right?
    A Fan Page is a more corporate, no friends, there are fans.
    A Fan page, used to communicate with the followers of your business, for example to advertise new products, special offers, etc..
    Setting permissions and privacy is much simpler in Fan Pages in the profiles.
    The content of Fan Pages are indexed by Google, the contents of the Profiles no.
    Of course your friends may be fans of your business page, but on the wall of your company will not see messages such as "Mario is now friends with Mary"
    Use this form to register your company, brand, business or your musical group on Facebook.

My recommendations:

    If you are adding your business on Facebook does not use the same email account with which they walk into your personal profile, use another.
    Once you have created the fan page, fill in the basic information tab. With a description of your business, do not forget the timing, location map, etc..
    The logo is essential.
    Respond to all comments you come through the wall of your page.
    Use straightforward language and close to communicate with your followers.
    It offers quality information ... offers, new campaigns, etc.. This is what will make a difference with respect to competition, which incidentally is also on Facebook.

Some marketing:

    Your initial goal is to make your brand more people know her as well as loyalty.
    When you are able to reach 25 fans, you can put a logical username to your Fan Page, for example www.facebook.com / andante772. Meanwhile you have is a url rather complex and difficult to communicate to customers of your store.
    When you have your username use it on your bills, your communication by mail, in your radio ads, on the label of your business, cars, etc..
    A good trick is to think that where post advertisements for the phone number of your business must also address the Facebook page.
    If you have a blog you must pair it with your Facebook page, this way it will post on the blog to Facebook automatically.
    If you have a website should be well placed the link to the Facebook page.
   Think that Facebook is a new way of communication with your customers and followers, therefore this condition the maximum squeezing.
    Inside your business, make visible this new Facebook address for customers who visit you.

Postscript. Unfortunately my friend created a profile and not a fan page for your company, is going more work than necessary and also its content will not be found by Google, to see what I say ... or better ... read it here. But ... branded tachaaann! Recommended readings have a link that explains how to convert a profile to a fan page!

Video Tutorial:

Enhanced by Zemanta

The Five key Elements that can not miss in your blog

For a moment let's get instead of those who visit our blog. What elements need to quickly find the blog? What do we offer?
This post also aims to serve as a guide so you can improve each section, begin!
share elements
Share Items to share the content of the post
If your post is interesting, the reader will want to share with your followers on social networks. You can not miss buttons Tweet, Like and Google +. Other options that you might like to analyze are Addthis or Sharedthis


elements of blogsElements to access information related
At the end of the post should provide related content, to ensure that whoever you choose to continue reading visit and in the best cases continue sharing. For example, tag your post, offers other related post thumbnails or links to other articles with the same label, post links with other words and / or your blog gives a table of contents.


elements to follow on blogElements to follow
If someone decides to share the content of your blog, you may want to follow in order to be aware of other publications. You can offer eg email follow through twitter (follow), through Facebook (fans) through Google + or via RSS (have a gadget for it or via FeedBurner).


elements of blogElements to facilitate direct communication
It is possible that your reader wants to express an opinion post through comments, want you to receive a private message through a contact form or ask a question directly via live chat.


blog contentPromotion of content elements
Think follower today who do not be aware of the post created last week, therefore promoted through social media content of your blog that is still valid. View article on Community Manager. Remember that you can automate your blog posts on Facebook, Twitter and Linkedin with TwitterFeed

As always, I invite you to use comments to leave your opinion on this article. If you liked this post and want to be anywhere else, follow me via Facebook, Twitter, subscribe by email, Google Friend, RSS now also on Google +. Use social buttons at the bottom of the post to recommend it to your friends. Grace

Creating a business page on Google+ and get badge for blog

At the beginning of the month of November 2011, Google opened the possibility that companies and brands to create your Google+ page. Until then, only allowed discharge of personal profiles. If you have a business, brand, company, or other musical group, it's time to have your own page on Google+.


Some time ago I wrote an article called "A company has no friends, has fans" and tried not to fall into the mistake of creating a personal profile to manage our brand presence on Facebook.

Now with Google+, and although it is mandatory to have a personal profile to create and manage a brand page (not in Facebook), which subsequently we empower our followers, customers, etc.. page is not marked as such profile that aims administration.

You should see the following video where you can see how a user added to his circles to a company that sells and repairs bicycles ZEN Bikes. The company uses Google+ page to announce not only their news but also as a meeting place with your customers with pictures of activities, hangouts (video conference), suggestion box, etc..


The strategy that Google poses to our business, is based on three pillars. The first is sharing, there is no doubt that this new space represents all a platform to share photos, videos, milestones and all we want to communicate the business. The second is to let you know by logos (logos) to be recognized by your followers and customers and aims to take you to your Google+ page. Finally measure ... and it's not easy to know the impact on our fans and customers, so Google is planning to offer in the future statistics on the use of your Google+ page


Steps to create your Google+ brand page and put a logo on blog


Step 1. Create a Page on Google+

     Sign in to Google+ for businesses and click on Create a page on Google+
     You must have already previously created a personal profile, otherwise you will give you high.
     Once inside you will see a screen like the one show below:

google plusSelect the button to the left (categories) that best defines your company brand. Depending on what you choose will ask certain data. Click the Create button to register your site
    In the next step will ask you to personalize the page with your company logo and a slogan.


Step 2. Get your insigna

    When your page is created, you will see a welcome page
    Click Get Badge (recommended) or accessed through this link you prefer on this link and then put the ID of your page if it appears empty. More info here
    Choose the type of logo that you like, I chose the large icon
    Copy the code to put on the blog now


Step 3. Add your insginia in Blog (Blogger)

    Open the tab "Design"
    In the sidebar select "Add New Gadget".
    A list, choose the one that says "HTML / Javascript".
    In content, paste the code obtained above.
    Save the template and view the blog.
    Remember that you can move the gadget to place it in the desired location.

How do I manage the new page on Google+?

When you enter your personal profile on Google+, you will see a dropdown to the left under your name from which you manage your pages.

How do I publish blog content on the new page on Google+?
So far I know of no service that links the publication of new blog posts to your Google+ page. So you should copy the url of the post that you happen to Google+ and paste it in the text box on your page News Google+

Post. In my case I have a personal profile and now a brand page, so far I have not seen a mechanism to migrate profile followers of the page.

We invite you to visit my Google+ page by clicking here or on the badge for you right.

As always, I invite you to use comments to leave your opinion on this article. If you liked this post and want to be anywhere else, follow me via Facebook, Twitter, subscribe by email, Google Friend, RSS now also on Google +. Use social buttons at the bottom of the post to recommend it to your friends. Thank you!
Enhanced by Zemanta

Google Chrome Extensions to be More Productive on Blogger

google chrome
google chrome (Photo credit: toprankonlinemarketing)
According to Wikipedia productivity can be defined as "the relationship between the results and the time we spend to get it." In this post, we'll dip into those extensions for Google Chrome browser, allowing us to just that, save time in the management and administration of our blog and therefore be more productive.

The first is recommend you use the Google Chrome browser, for several reasons. The first is that with Google Chrome get greater compatibility with Google services and more now with the new changes in services since many of them are based on HTML5 and CSS3. The second and most important, the "Extensions" which are nothing more or less that additional functionality can be built into the browser itself.

The most practical way to approach this article is pintándote few everyday situations to see if you identify with any of them.


"I lose a lot of time looking for a way to access Google services"
Managing a blog is challenging, we have to go into Google Analytics to see statistics, then we will see if we have Gmail for email, respond to blog comments, etc.. We entered Blogger to also see statistics, compose new post ah ... and from time to time we look at our piggy bank called Google Adsense to see if we have some income from advertising, not to forget where we annotations Google Docs, Calendar, etc..

Google Shortcuts is a browser extension that offers access Google services (160) that most interest us with a simple click. Once installed you just have to look for services, click to add them to the list. Remember that you can manage your extensions from menu Tools -> Extensions or put in the browser address bar this chrome :/ / extensions /


"I lose a lot of time on my social networks to share the same information"
Besides that we have linked our blog with Facebook or Twitter you may be interested in publishing a link to specific input in order to re-promote it. So it is very common to have to go on Twiiter, Facebook, Linkld to post the same.

Sharedaholic, lets share links on your social networks. You can configure it to show you only the social networks that interest you. Now just copy the url of your post and click on this button to send it to all the social networks you've previously configured.


"I lose a lot of time writing down links to pages to read later."
It happened to you that you are preparing a new post for your blog and find the documentation phase reference articles and enter to Gmail or Google Docs simply to copy the URL of the article to read later.

Read Later Fast, allowed once on the item you click the right mouse button and press the Read later (see below). When you have time, open the browser and click on a new tab, press the Read application later and get access to items previously marked.


"I lose a lot of time getting to Gmail just to check if I have new messages."
Those expecting an important message and are continually checking your inbox and anything that does not come.

Gmail Checker shows you in the browser bar icon with the number of unread messages. Now you know in advance that you have something pending in your inbox.


"I like to be aware of the particulars of my Twitter"
If anything characterizes Twitter is the immediacy of information. It may interest you at all times monitor this network without having to be changing in the browser tab.


Silver Bird is a lightweight Twitter client for Chrome, so like Gmail Checker alerts you to tweets that mention you, besides letting you tweet directly

"I have to be continually capturing screens, cropping ..."
Indeed, when you write a tutorial on a web service, you lose a lot of time on this task.

Capture and Annotate allows you to capture all or part of the browser window, annotate and store the result in a PNG or even host the file on the web.

Here we mention the most common extensions that usually work with. There are thousands of extensions, both free and paid. Connect with Google Web Store to find more extensions for your browser.

Conclusions, extensions for Google Chrome help us save time and are therefore more productive, allowing us to focus on what really matters, the creation of new content on the blog.


As always, I invite you to use comments to leave your opinion on this article. If you liked this post and want to be anywhere else, follow me via Facebook, Twitter, subscribe by email, Google Friend, RSS now also on Google +. Use social buttons at the bottom of the post to recommend it to your friends. Thank you!
Enhanced by Zemanta

Monday, May 6, 2013

What is Buffer and how to combine it with Blogger


Buffer is a service that allows you to store the notifications you cast from your blog to your social channels (Twitter, Linkedin or Facebook) for publication following is a schedule. In this article I give the keys to combine it with Blogger.

 One of the tasks as bloggers have to consider, is to promote not only the new post, but the above, as long as they maintain in full force and interest. In my case, what I did was open my post and click the Twitter button. Of course, not knowing if it was the best time or the best time. Also I did not like suddenly Tweet 3 or 4 items. So finally it was all a bit random and not follow a specific pattern. For me it has been a great discovery and I encourage you to implement it in your daily make as a blogger.


What is the idea?
The idea is simple. We continue by clicking on the Twitter button as if we were to publish but instead of "Tweet", Buffer will press the button, so that is not published at the time, but following a schedule and based on previous stock you have on Tweets for launch from Buffer. Ideally, go fill your Buffer and make 1 full week.

If you have the Twitter button you can also send your post to Buffer using the right mouse button, or by a new icon that will display in your browser to read it.

What does BUFFER against direct notification to your followers?


As I said before, Buffer is as a collector of the notifications you want to convey to your followers on Twitter, Facebook or Linkedin. Instead of launching a direct notification, it is stored to be launched following a few hours a day. Of course not everything has to go through the buffer, you can continue to report to your followers, as has been done so far. Remember to sync your new publications with your social channels can use IFTTT (recommended) or TwitterFeed.

Keys to combine Buffer with Blogger
Buffer register and Configuration

    Sign in BufferApp, creating a new account or using Twitter, Facebook or Linkedin
    Connect with your different accounts Buffer
    Click where it says Settings at the top to access the calendar
    Choose your social channel and now you can configure which days of the week and what time throw your notifications. (See this screen)

Install Buffer extension for your web browser

    Browser extension for Google Chrome (recommended)
    FireFox browser extension (from the extras of Buffer)
    Sailed Extension for Opera

"Buffea" your first post using the Twitter button
Do the usual, ie see a post and click on your button Twitter. Just click it and watch you Buffer button appears next to the button for Twitter. To add to Buffer should indicate by what account (Twitter, Facebook or LinkedIn) you release it (may be three).

Now just send the Buffer tickets that you want to promote during the week, so that you have more time to new content, pending comments or simply respond sports, lol.

Install Buffer on your SMARTHPHONE
The mobile application allows you to share with Buffer any web address you're visiting. Plus you have access to your schedule can view the status of Buffer and statistics of each notification released. I have it installed and check the soil often.

    Buffer app for iPhone, iPad
    Buffer app for Android (Google Play)

How to know what time notify my followers?
This is the big question. What we want is that the impact of our notice have more effect. This is achieved notice in those times of the day where you have more active followers. For this statistics online services are able to provide this data. Furthermore, these services can automatically set Buffer schedule adjusting those hours more active followers.

    Timely
    Tweriod (very easy)
    SocialBro (Chrome extension)

Did you know BUFFER? Do you're using? Do you see it practical?
I would like to complete this article with your comment. Also if you consider it interesting to your friends and followers share used social buttons located at the foot of the article.


Enhanced by Zemanta

Thursday, May 2, 2013

How To Combine Pinterest With Blog Of Blogger

Pinterest is a new social networking booming, its name comes from the words Pin + Interest and its philosophy is the type "A picture is worth a thousand words." The idea is as simple as effective and in this post we will see how you can use it to promote and position the contents of your blog on this new network.

 What is Pinterest?

Uff ... maybe you put an example, imagine that you plan to decorate a room. Surely you begin looking for some ideas in decorating magazines and cut out some of the photos, that's what is called making a PIN. When trimmed the photos you put on a corkboard, or in the refrigerator or in a notebook of meeting, this is called Dashboard.

Words on Pinterest you can create different boards or bulletin boards for through cuts collected go Pins (photos or videos) that ultimately link to the page or the original post.

As a social network, can follow or follow one or more of your boards. Similarly you can follow other people.

How do I integrate with Blogger Pinterest!
You have a blog, right? If your blog comes to dessert, cooking, crafts, travel, fashion, decor, film, music, photos, etc., if ultimately have a significant visual component to your post, you're in luck. Your blog is your magazine and post the pages of it, and therefore have a job and is "Pin It" your best post on Pinterest.

Keep in mind that the more attractive the visual part of your post greater chance that someone will click on the picture from Pinterest and drive to your post and best of all, you start to follow you.

Sign in options
To join Pinterest, you only need to register on http://pinterest.com, remember that you can validate you with your Facebook or Twitter account.


Video tutorial Pinterest


Getting Started on Pinterest
Here are the steps once you have your invitation.

     You can log in using your Twitter, Facebook or via Pinterest
     Fill in your profile data, logo / photo, name ...
     Install button "Pin It" in the bookmarks bar of your browser
     Browse through your blog and open one of your posts, click the Pin it
     You will see a new window where you are prompted to select the image that represent this Pin
     Create a Board, my advice is that you respect the classification that you have on your blog with tags and ready!. You got your first Pin and your first board.


Pinterest on your iPhone
Download here Pinterest Free for your iPhone, so using the camera take a picture of a meal, to a painting or landscape and "pinéala" directly.


Why Pinterest is important for my blog?

Until now we have always emphasized that the content (text) is the most important for Blogger because on them depends the positioning of the blog, now if we lucirnos within options should also enhance the images included in our items, this makes excel, internalize that every post on our blog is like a page from a magazine, so the end result is much more professional and all options and Blogger makes an explosive combination.


One last tip, variety is the spice, so create your hobbies and tastes in parallel with the boards of your blog.

Wednesday, May 1, 2013

How Avoid The Same Description On Google Search

In this article we look at how to keep our post with the same description in Google result page, thus improving the SEO of our blog.


At Blogger you can indicate a description of the blog on the Settings tab and then description. This is highly recommended, but you must make a simple change to the HTML template so that this disclosure affects only the main blog address leaving as a description of each post the first paragraph of the same (156 characters), for this we will use a Simple conditional.

Do a search of your blog on Google to see if there is a problem

    In the search key Google Site: laurldetublog.blogspot.com
    Analyze the result. Here is a picture where you can see the problem


If you have configured Google WebMaster Tools, go to the Diagnostics tab and then click HTML suggestions and see where it says meta description should show the number of posts containing the same description. This is what we will address in this post.
search browser


Note: As you can see in the picture above, the description is the same in every post.

Steps to prevent all post show the same description

    Go to the Template tab and click Edit HTML button
    Find (Ctrl F or Ctrl B) this line in the code: CDATA [/ *
    Copy the following code and paste it just before the position where the previous line encontrastes:

    cond='data:blog.url <b:if data:blog.homepageUrl'> ==
       <meta content='Aquí must indicate the description of your blog' name='description'/>
    </ B: if>

Note: This code snippet should be in the head section ... </ head> blog. If you already have a fragment description is just add the condition.

Although it is a topic that is discussed in their day through this page, I have seen fit to make a post because of the importance from SEO perspective. Remember also that this issue (description and duplicate titles) is reported by the Webmaster Tools.

After applying the change to the template may take 1-2 weeks to see the new descriptions on the Google results page.

Finally thank the initiative of several followers of iniciaBlog for proposing this topic.

As always, I invite you to use comments to leave your opinion on this article. If you liked this post and want to be anywhere else, follow me via Facebook, Twitter, subscribe by email, Google Friend, RSS now also on Google +. Use social buttons at the bottom of the post to recommend it to your friends. Thank you! ;-)

Sunday, April 28, 2013

How To Place A Sticky Bar With Facebook Like Button

stickybar for bloggerThe previous version of sticky were well entertained and some of you asked how to add Facebook like button and Google Plus button to the stickybar. If you have already added the sticky bar then you just need to make few changes to your old code.

Only step#6 is different else all styling and HTML is the same which we used in our previous tutorials else you can try these new codes from start and delete the previous one.  Stickybar is just a custom version of hello bar but it has no Ads and can easily be styled and customized to blend your blog template.

 Since it is always better to have your own custom widgets therefore we designed this easy bar which sticks to the top of your blog or website to grab the attention of all visitors. Both these social plugins would help you increase your fan following. The Facebook like button will be linked to your fan page so that any like may turn out into a Fan. Lets get to work then!


Add Stickybar to Blogger


Follow these easy steps:
  1. Go To Blogger > Design > Edit HTML
  2. Backup your template
  3. Search for this
]]></b:skin>

   4.  Just above it paste the following CSS code,
/*Stickybar*/
#mbt_bar{
background:#0080ff url('https://blogger.googleusercontent.com/img/b/R29vZ2xl/AVvXsEhINBPA6PD1IzSMNUZiEjIPJw8YMo99C7bmyKz5BG-_o1fxkeVuTlpMuj-0Aw38sjzUEWWSeJu7E0GQE0ko5yCvTjLVBCEx7qcIa37Gz5kpK4FJqpHEWzFAaFPsngmwUJuh2L9R0aqwDTI/s400/stickybar.png') repeat-x;
width:100%;
margin:0 auto;
text-align:center;
padding:3px 0 0 0;
border-bottom: 1px solid #888888;
  -moz-box-shadow: #666666 0px 1px 3px;
  -webkit-box-shadow: #666666 0px 1px 3px;
  box-shadow: #666666 0px 1px 3px;
  z-index: 999;
height: 28px; position:fixed;
line-height: 1.85em;
vertical-align: baseline;
letter-spacing: 1px;
color:#fff;
font-size:12px;
font-weight:bold;
font-family: arial,"Helvetica",sans-serif;
}
#mbt_bar a{
text-decoration:underline;
color:#E2E504;
}
#mbt_bar a:hover{
text-decoration:none;
}
#mbt_bar p {margin:0; list-style:none;}
#mbt_bar img {vertical-align: middle;
      margin-right: 6px;}


Next search for </head>   and paste the following Javascript code just above it
<script type='text/javascript'>
//<![CDATA[
var mbt_arr = new Array();
var mbt_clear = new Array();
function mbtFloat(mbt) {
mbt_arr[mbt_arr.length] = this;
var mbtpointer = eval(mbt_arr.length-1);
this.pagetop = 0;
this.cmode = (document.compatMode && document.compatMode!="BackCompat") ? document.documentElement : document.body;
this.mbtsrc = document.all? document.all[mbt] : document.getElementById(mbt);
this.mbtsrc.height = this.mbtsrc.offsetHeight;
this.mbtheight = this.cmode.clientHeight;
this.mbtoffset = mbtGetOffsetY(mbt_arr[mbtpointer]);
var mbtbar = 'mbt_clear['+mbtpointer+'] = setInterval("mbtFloatInit(mbt_arr['+mbtpointer+'])",1);';
mbtbar = mbtbar;
eval(mbtbar);
}
function mbtGetOffsetY(mbt) {
var mtaTotOffset = parseInt(mbt.mbtsrc.offsetTop);
var parentOffset = mbt.mbtsrc.offsetParent;
while ( parentOffset != null ) {
mbtTotOffset += parentOffset.offsetTop;
parentOffset = parentOffset.offsetParent;
}
return mbtTotOffset;
}
function mbtFloatInit(mbt) {
mbt.pagetop = mbt.cmode.scrollTop;
mbt.mbtsrc.style.top = mbt.pagetop - mbt.mbtoffset + "px";
}
function closeTopAds() {
document.getElementById("mbt_bar").style.visibility = "hidden";
}
//]]>
</script>
   Then search for <body>  and just below it paste the following HTML code
<div id='mbt_bar'> <span style='padding-right:5px; float:right'> <img align='absmiddle' border='0' onClick='closeTopAdsundefined);return false;' src='https://blogger.googleusercontent.com/img/b/R29vZ2xl/AVvXsEio4PMTR-rxCpW9YuAS0dD5TghzyOgEqB9USkhpeA2CH3eFCU_VFA77GjCwFMim0DKHPz9NV4oKWg6U-7UhQmXRX2D4bl0lLRvr6kZEscdJ0gbGCBN-Q6I3x_-hsWc_tMvB_QbWT4rd3AM/s400/cancel.png' style='cursor:hand;cursor:pointer;'/></span><div style='float:left; padding-left:10px;'>Stickybar with social Plugins</div> <div style='float:right; padding-right:0px;'> <p style='font:bold 12px arial; float:left; margin:5px;'>Liked us?</p><iframe allowTransparency='true' frameborder='0' scrolling='no' src='http://www.facebook.com/plugins/like.php?href=https%3A%2F%2Fwww.facebook.com%2Ftrucosdeblogger&amp;send=false&amp;layout=button_count&amp;width=80&amp; show_faces=false&amp;action=like&amp;colorscheme=light&amp;font&amp;height=21' style='border:none; overflow:hidden; width:80px; height:21px;'/> <g:plusone href='http://tricksblogspot.blogspot.com' size='medium'/> </div> </div>


You can write your message, announcement, anything you like instead of that purple text.
Replace blogger tricks with your Facebook Fan Page Username  and replace our blog link with yours.
    Note: Skip this step if you have already added google+ button somewhere already in your blog.
Paste the following code just below ]]></b:skin>

 <script src='http://apis.google.com/js/plusone.js' type='text/javascript'> {lang: &#39;en-US&#39;} </script>

 8. Save your template and you are all done! Visit your blogs to see it fixed at top just perfectly


Enhanced by Zemanta

Wednesday, April 3, 2013

What is a blog and what is for?

Image representing Blogger as depicted in Crun...
Image via CrunchBase
What is a Blog?
A blog is nothing more nor less than a diary. This diary can be personal or have a more commercial and corporate.

Every time you write something new you do it in a new page or what is called Post or input. , The most important is the content, quality and should be attractive both in substance and in form.

What things do I can write on the blog?

    On products, news, events and milestones of your store or business.
    About gardening, photography, sports, crafts, mechanics.
    On technology, travel, fashion, news, poetry, art, music, cinema.
    About family, children.

In each entry as part of the text, you can insert photos, videos and audio.

Which is more important the content or design of the blog?
Certainly both are important but should give priority to the content must be original content as I said before (no copies) and quality. You must be clear about what to write, who you're going to lead, shape and purpose of the blog. Finally you must be consistent and write if not every day in several a week. Actually the latter is the most important, how to write or who the wrath perfected over time. With regard to design what angers slowly improving but can not be the priority.

Google Blogger 
Now you need a manager for the blog, and that is when I introduce Google Blogger. This service (Blogger), you can create blogs, create and edit entries or post, customize the design of it, you can configure it to indicate whether such a blog is public or private to certain people ... The most important thing, so free and also over time your post will appear in the Google search engine.

Therefore we conclude that a blog is the most economical way to have an Internet presence, and is applicable to all whether you are an individual, entrepreneurial, independent or company. If you want to create a blog user community should be the focus of your strategy.

What do I need to create a blog?
Enthusiasm for what you are going to undertake and dedication to keep
A Gmail (Google Mail). If not, you can create it from here.

You do not need:
No need to know HTML or Web programming.
You do not need a hosting (hosting) and it gives you Google for free.
You do not need a domain, when you create your blog Google assigns you one free on the start. Example www.one.blogspot.com (later you can change by a. Com)

Steps to create the blog:
Connect with blogger and follow the wizard until you write your first post. When you publish, you have already created your blog and have a web address or url where invite your friends.

Of course I recommend you follow this blog because it is, how to start a blog and what aspects should be given slowly. All items listed on this blog are explained in subsequent entries. We will see interesting subjects like button "Like" on Facebook at each entrance or how to put social icons and even a music player.

Animated Stylish Bookmarks Widget For Blogger Blo

The social bookmarking gadgets and widgets objetive is to catch the eye of visitors and get them bookmarking your blog.

Here i will show you a social bookmarking gadget with a stylish animated effect.This stylish bookmarks gadget a basic share button is placed in the corner of your blog, then on hover 6 icons for the main social bookmarking websites appear in a semicircle.

The buttons that appear are for Pinterest, Google+, Facebook, Twitter, Tumblr and Email.

animated stylish social bookmark gadget

Add This Animated Stylish  Bookmarking Gadget To Your Blog today.

Note:Remember Always Back Up Your Template Before You Make Changes .


To Back Up A Blogger Template follow this Steps.

Step 1. In Your Blogger Dashboard Click The Drop Down Menu For Your Blog > Choose Template > Then Edit Html > Tick The Expand Widget Templates Box .


Step 2. Find the following piece of code in your blogs Html : (Click Ctrl and F for a search bar to help find the code:
</body>

Step 3. Copy and Paste the following code Directly Above / Before </body>
 ---------------------------------------------------------------------------------------------------------------------------------


<!-- Start Shareaholic Stylish Bookmarks script -->
<script type='text/javascript'>
(function() {
var sb = document.createElement(&quot;script&quot;); sb.type = &quot;text/javascript&quot;;sb.async = true;
sb.src = (&quot;https:&quot; == document.location.protocol ? &quot;https://dtym7iokkjlif.cloudfront.net&quot; : &quot;http://cdn.shareaholic.com&quot;) + &quot;/media/js/jquery.shareaholic-publishers-ss.min.js&quot;;
var s = document.getElementsByTagName(&quot;script&quot;)[0]; s.parentNode.insertBefore(sb, s);
})();
</script><small><a href='http://tricksblogspot.blogspot.com/2012/05/animated-stylish-social-bookmark-gadget.html'>Animated Social Gadget</a> - <a href='http://tricksblogspot.blogspot.com'>Blogger And Wordpress Tips</a></small>

<!-- End Shareaholic stylish Bookmarks script -->
------------------------------------------------------------------------------------------------------------------------------
 Step 4. Save Your Template.

Enjoy!


Monday, April 1, 2013

How to put photos from Facebook fans on the blog?

In this article, we will see how to put the typical table showing the faces of the people (fans) who follow the blog through Facebook. It is what is called a "Like Box" ...

As you know, people of Facebook has a page specifically dedicated to developers, who can enable social elements into your blog or website. It is highly recommended not to use it even know initially.
We summarize the different elements that can be found:

    Like Button: The button that we put in each blog entry
    Activity Feed. Shows a box wall with activity
    Recommendations. Displays a box with those wall postings with votes
    Like box. It is the example we are doing right now.
    Login Box. It's a login button of facebook account
    Registration. Create your user registry from your own Web (combined then with the Login Box)
    Comments. It's a box to post comments from your website or blog, these are posted on the wall
    Live stream. Ideal for live events and live, allows active participation of users. A kind of chat where you seeing what others are writing. Example broadcast of a sporting event where you have for example the video of a football game on the right have this Live Stream that allows real-time feedback. Penalty!, Penalty!, Lol.

Follow these steps to see a box with photos of fans in your blog or site:

    Open another browser tab your fan page
    Copy the web address (URL) in the navigation bar of the browser itself
    Connect with this page
    Where it says "Facebook Page URL" you must paste the address of your site on Facebook
    Set the various parameters
    Click the Get Code button, copy it (is a iframe)
    Design Go
    Add a Gadget of type HTML / Java Script Menu on the right.
    Paste the code into the Gadget
    Press the Save button and see your blog

Here's my example:

    <Iframe scrolling = "no" frameborder = "0" style = "border: none; overflow: hidden, width: 210px, height: 230px;" allowtransparency = "true"> </ iframe>


You can see it working right in the vertical menu, set the parameters of width (W) and height (h) to adjust and integrate into your site.


Note: Only works with Fan Pages (fanpages) not a personal profile.
Enhanced by Zemanta

The key elements that can not miss in your blog

For a moment, let's put ourselves in place of those who visit our blog. What elements need to find quickly in the blog? What do we offer?


This post also aims to serve as a guide so that you can improve each section, begin!

Share Elements for post content sharing
If your post is interesting, the reader will want to share with your followers on social networks. A must buttons Tweet, Like and Google +. Other options that you might like to analyze are Addthis or Sharedthis

Elements to access information related
At the end of the post should provide related content, to ensure that whoever you choose to continue reading visit and in the best cases continue sharing. For example, tag your post, provides other related post thumbnails or links to other articles with the same label, post links with other words and / or your blog gives a table of contents.

Elements to follow
If someone decides to share the content of your blog, you may want to follow in order to be aware of other publications. You can offer for example, follow by email, via twitter (follow), through Facebook (fans), using Google + or via RSS (have a gadget for it or via FeedBurner).

Elements to facilitate direct communication
You may post your reader wants to express an opinion through comments, want you to receive a private message through a contact form or ask a question directly via live chat.

Promotion elements contained
Think follower today who do not be aware of the post created last week therefore promoted through social media content on your blog that is still valid. View article on Community Manager. Remember that you can automate your blog posts on Facebook, Twitter and Linkedin with TwitterFeed
Enhanced by Zemanta

What is IFTTT and how to combine it with Blogger

ifttt tasks
ifttt tasks (Photo credit: sekimura)
IFTTT is one of those tools that once you know hooked. Learning to combine it with Blogger, facilitate the work of disseminating your post to social networks.

IFTTT The name is derived from the phrase "If This Then That" which translated means something like ... "If this happens then do this instead." For example, if I publish a new post in Blogger, then Twittéalo.

 Once you set up an action you've managed to create a Recipe or Recipe. You can create as many recipes as you like combining ingredients like Blogger, Twitter, Facebook, Linkedin, Wordpress, Flickr, Instagram, RSS, Buffer, Youtube, Date and Time, Time, Gmail, SMS, Evernote and so up to 51 different channels. Imagine the possibilities. A recipe consists of a maximum of 2 ingredients. As you go using new channels, the creation wizard will ask you to activate.


What is the goal we seek with IFTTT?
The aim is to make the information flow between the different services and social networks that supports IFTTT. I mean, the hardest part is done, you got drafted, revised layout and a new article to your blog. Once you publish should be launched all the machinery of diffusion into social channels you have.

With this tool you should save time spreading your publications, therefore have more time for you, so you have no excuse not to play sports: D

Sicronizar Blogger with Twitter, Facebook and Linkedin.
What use TwitterFeed or IFTTT?

We learned to synchronize the blog with Facebook, Twitter and Linkedin using TwitterFeed. However with IFTTT have more control over the final content to publish, possibility to combine with other services and attending other events. As you can see from the list can be complementary, although I personally have disabled TwitterFeed to focus on this other tool and get the juice.

10 recipes IFTTT applied to Blogger
Let's see what you can do using this service as one of the ingredients Blogger:

    If I publish a new post Blogger then publish it on Twitter / Facebook / Linkedin (3 recipes)
    If I publish a new post Blogger then make a copy in Dropbox / Google Drive (2 recipes)
    If I publish a new post in Blogger Tumbrl then publish it also in / WordPress (2 recipes)
    If a friend published a new blog post (using the ingredient Feed) Launches entoces my followers Tweet your news
    If I publish a new post in Blogger then send an email / SMS / telephones a person (3 recipes)
    If a video frame as a favorite on YouTube then published a post on Blogger
    If a photo frame as favorite Flickr / Instagram then publish a post on Blogger (2 recipes)
    If I ckecking with photo on FourSquare then publish a post on Blogger
    If you checked items in Google Reader favorites publishes a new post in Blogger
    If I receive an email (GMail) with certain subject published a new post in Blogger

Other recipes very curious IFTTT


    Using the service date and time, you could create one recipe that a good night to your followers on Twitter, but you bring a couple of hours sleep.
    Using Time ingredient, you could receive an email if tomorrow forecast is for rain.
    Belkin Finally a company has developed a power switch and a motion detector for home that is integrated as one of the 51 ingredients and can for example, create a recipe to turn on a light in your home or receive a email reminding you that you have to clean the cat litter box every time this visitor.

How to create a new recipe
The process is very simple. The first thing to do is register on IFTTT and once inside you can browse the recipes shared by other users.


IFTTT Did you know? Do you're using? What is your favorite recipe?

Enhanced by Zemanta

How to take advantage of Google+ followers gadget in Blogger

But now you can add a gadget in Blogger which displays the profile picture and the number of people you have in your circles in Google+, and facilitates action follow through Google's social network.

In this article we will see how to add it to your blog, as well as a series of tips to make the most of.

 Notable Features
It is a visual element that will highlight your blog.
Clearly draw the attention of those who visit you. Below I outline some of the key features:

    Who visits your blog, you allow follow easily using the button Add to circles
    Shows profile pictures of some of those people with link to their respective profiles. This makes your reader that you know your community and add more people to your circles.
    Displays a counter of the number of people who follow you
    Facilitates who visits you access to all the people who follow you through the link at the bottom right
    Also available for those who use dynamic templates.
    Automatically adjusts to the width.
    The high is always a maximum of four rows of photos


How fans show your personal profile or fan page of your company / brand Google+?

This is a key feature that I believe important to note. This gadget is able to display information on your personal profile or business page on Google+. This depends on how you have linked your blog with Google+. To view it should go to the Google+ tab default and whether it is linked to your personal profile page or your brand. It is one of the main differences with LikeBox Facebook and the latter is "only" shows fans a brand page and personal profile.


The new Followers gadget, others retire earlier gadgets

Knowing that this gadget can display information on a Google+ profile, can question you company logo or add me on Google+ gadget (third party) that has become totally obsolete, so cuestionártelos if you had in your blog.
Advice on the position of the followers gadget Google+

Given that it is very visual and invites to follow, ideally situated located in top of the side of the blog, so check out who you have not moved the page to see it. Anyway the Gadget automatically adapts to the width so it fits perfectly to the foot or the head, is a matter of taste and taste. Either vertically or horizontally on the maximum number of rows is four Current transition.

If like me, you have presence on various social networks will have to decide which prevails over, finally mention being combatible with Google Friend Connect gadget and both can be displayed on your blog.

Note: This section does not apply to those who use Blogger dynamic templates, since the position is always floating to the right.

How to add the Google+ followers gadget to blog?

Follow these step:

    Go to the Layout
    Click Add a Gadget
    From the list select followers Google+
    Drag the gadget to the desired
    Save and view your blog

Go try different positions to find the one you think best.
You knew this Gadget? Have you applied for your blog?, Have presence in Google+? Are you one of those who have gone portrayed in this post?
Comment on this post, it is important to know your experience. Thank you.
Enhanced by Zemanta

Saturday, March 30, 2013

The Trick Of Adding Twitter Bird Flying Through The Blog

English: Tweeting bird, derived from the initi...
English: Tweeting bird, derived from the initial 't' of Twitter Deutsch: Twitschervogel, entwickelt aus dem Anfangs-'t' von Twitter (Photo credit: Wikipedia)
We have seen different ways to customize the varieties of plugins Blogger, gadgets and hundreds of other things. This time I will show you how to get the Twitter bird flying through the blog.

This bird allows to tap the icon to open the User on Twitter and users can follow.


Preview gadget:


You will see that the bird is moved to different parts of the blog, and not just up and down, but also in a diagonal direction.

How to get this plugin?

First, lets go to '' Design / Page Elements'' where'' press on Add a Gadget'':


 Look for the gadget HTML / Javascript


Then paste the following code:

     src="https://sites.google.com/site/ayudabloggers/scripts/tripleflap.js" <script type="text/javascript"> </ script>
     <script type="text/javascript">
     var
     var targetElems = new
     twitterAccount var = 'http://twitter.com/USUARIO';
     twitterThisText var ='';
     tripleflapInit ();
     </ script>


Press '' Save'' and Done:


Note:

     Remember to change the "user'' username of your Twitter account.

Enhanced by Zemanta

Simple Trick to Add +1Botton to blogger

Simple shot of how the new Facebook

How to add the +1 Button to Blogger with simple trick?

  1. Go To Blogger > Design > Edit HTML
  2. Backup your template
  3. Search for </head>
  4. Paste the code below just above </head> 
----------------------------------------------------------------------------------------------
<script type="text/javascript" src="http://apis.google.com/js/plusone.js"> {lang: 'en-US'} </script>
-------------------------------------------------------------------------------------------------
     5.   Check the "Expand Widgets Templates" Box at the top right corner. In order to place the button just below Post titles then search for this code <data:post.body>  and place the +1 button code given below just above it,
<div style='float:left'>
<g:plusone size="standard" expr:href="data:post.url"/>

</div>
  • You can display it to "left" and "right" by adjusting left
  • You can change standard to medium, small or tall. Choose the size that may blend your template.
Tall, small, Medium Respectively Samples:
image
image
image
   

---------------------------------------------------------------------------------------------
6.  If you want the button to appear below blog posts then add the button code just below <data:post.body>
    7. Save your template to see it working. Have fun! :>


Other Method

To add the +1 button to your blog directly without any code then you’ll need to enable Share buttons on Blogger. To do this, go to Design > Page Elements on your Blogger dashboard, find the Blog posts area, click on Edit, and select the “Show Share Buttons” option. If you are already using Share buttons, then you don't need to worry as the +1 button will automatically show up as a new share button.
Enhanced by Zemanta

How To Add Facebook Comments Box To a Blog

"Facebook Comments Box". This plugin can be embedded in any website or blog and visitors can use their IDs of Facebook, Yahoo, AOL or Hotmail to leave a comment at your site. This plugin did show a lot of problems when it was embedded in Blogger Blogs in initial days of its development but now thanks to our fellow friend Max from Allblogtools this plugin has been finally bloggerized to work just perfect with any Blogger hosted blogs.


                                             The Facebook Comments box looks like,
LIGHT SCHEME
facebook-commentS-box LIGHT
DARK SCHEME
Facebook-comments-dark-scheme

How to embed this extremely useful comment form in Blogspot blogs.
Follow these steps:

1- Get a Facebook Application ID

  1. Go To Facebook Developers Page
  2. Submit your blog URL and give it a name. Keep Site name as your "Blog Title" and Site URL as your "blog address"
site-url
     3.   Hit "create app" button and proceed
     4.   After submitting the security check code you will see this page,
app-id
       5.   Save that App ID in a notepad because you will need that latter. Now Click the link near the top-right corner of the same page that says "Developer Dashboard"
image
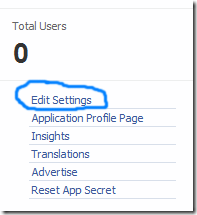
      6.  One the new window that appears click the Edit Settings link ,
edit-settings
        7.  Then go to Website option and write your Site Domain as blogspot
website
       8.  Save Changes and jump to the next step of this tutorial

2- Adding the Facebook comments Box to Blogger

Now mbed the comments box in your blog templates. So follow these easy steps,
PS: Please make sure your blogger comment form is embedded below posts. For doing this first go to Blogger > Settings > comments > and then choose embed comments below posts. After doing this follow the tutorial below.
  1. Go To Blogger > Design > Edit HTML
  2. Backup your template
  3. Check the "Expand Widget Templates" box
  4. Search for <html and just after it give a space and add this code,
xmlns:fb='http://www.facebook.com/2008/fbml'
  5.  Next search for 
<body>
Note: In New Blogger Designed templates the same code looks like this,
<body expr:class='&quot;loading&quot; + data:blog.mobileClass'>
Find any one of these codes and just after it paste the code given below,
<div id='fb-root'/>
<script>
    window.fbAsyncInit = function() {
    FB.init({
      appId  : &#39;YOUR_APP_ID&#39;,
      status : true, // check login status
        cookie : true, // enable cookies to allow the server to access the   session
      xfbml  : true  // parse XFBML
    });
  };
    (function() {
    var e = document.createElement(&#39;script&#39;);
      e.src = document.location.protocol +   &#39;//connect.facebook.net/en_US/all.js&#39;;
    e.async = true;
      document.getElementById(&#39;fb-root&#39;).appendChild(e);
    }());
</script>


  • Replace YOUR_APP_ID with your Facebook application ID that you saved in a notepad.
    6.    Next search for  </head> and just above it paste the following code,
<meta expr:content='data:blog.pageTitle' property='og:title'/>
<meta expr:content='data:blog.url' property='og:url'/>
<meta content='
MYTricksBlogger' property='og:site_name'/>
<meta content='
BLOG-LOGO-IMAGE-LINK' property='og:image'/>
<meta content='
YOUR_APP_ID ' property='fb:app_id'/>
<meta content='http://www.facebook.com/mybloggertricks' property='fb:admins'/>
<meta content='article' property='og:type'/>

Now Make these changes:
  • Replace MYTricksBlogger with your blog title/Name.
  • Replace BLOG-LOGO-IMAGE-LINK with the image link of your logo. Your logo will look good if it is in gif format and having this size ->  40px by 40px . This logo will appear next to your post title on Facebook profiles of your visitors like this,
logo
  • Replace YOUR_APP_ID  with the your Facebook Application ID that you saved in notepad
  • Replace http://www.facebook.com/mytricksblogger with your Facebook user profile link
    7.    Now Search for this,
<b:includable id='comment-form' var='post'>
    8.    Just after it paste the code given below,
<b:if cond='data:blog.pageType == &quot;item&quot;'>
<div style='padding:0px 0px 0px 0px; margin:0px 0px 0px 0px;'><script src='http://connect.facebook.net/en_US/all.js#xfbml=1'/>
<div> <fb:comments  colorscheme='light' expr:href='data:post.url' expr:title='data:post.title' expr:xid='data:post.id' width='520'/></div>
<div style='color:#fff; background-color:#3B5998;border: solid 1px #ddd; font-size:10px; padding:3px; width:510px;'>Facebook Blogger Plugin: Bloggerized by <b><a alt='blogger templates' href='http://www.allblogtools.com/' style='text-decoration:underline; color:#fff;' target='_blank' title='blogger templates'>AllBlogTools.com</a></b> Enhanced by <b><a alt='blogger widgets' href='http://www.mybloggertricks.com/' style='text-decoration:underline; color:#fff;' target='_blank' title='Blogger Widgets'>MyBloggerTricks.com</a></b></div></div>
</b:if>
  • If you want to use the dark scheme then simply replace light with dark
  • To change the Comments box size, change this value width='520'
  • To change the footer credits size, change this value width:510px
  • Keep a difference of 10 pixels between the box size and footer size. For example if you set box-size to width='600' then set footer-size to width:590px

      9. Save your template and you are Done!
Enhanced by Zemanta

Botones Isometricos de Social Media


Barra Lateral Fija