Welcome Enjoy Tutorials

Liked us?

Showing posts with label Cascading Style Sheets. Show all posts

Thursday, May 30, 2013

How Made Round and Augmented Avatars in Blogger

I've always tried to have a good design in my comments and now with the new nested comments CSS inadequacies all I had in my comments but thank God the CSS is wonderful and I've slowly been rebuilding and between those Rebuilding this the increase in size the avatar and change it so that by default is 36 * 36px and square but with a bit of CSS can be increased to 50px and put it round.

With the hack today I present the avatars remain as follows:


To add this trick WILL NEED paste before]]> </ b: skin> the following:

.avatar-image-container,
.avatar-image-container img{
 max-width:50px !important;
 width:50px !important;
 max-height:50px !important;
 height:50px !important;
 padding: 0 !important;
 border:0px;
}

With the above code will increase the size of the avatar to 50px, clarification you can increase even more the size of the avatar but it is highly recommended.

Now if you want round avatars paste before]]> </ b: skin> the following:

.avatar-image-container,
.avatar-image-container img {
 max-width: 50px !important;
 width: 50px !important;
 max-height: 50px !important;
 height: 50px !important;
 padding: 0 !important;
 border: 0px;
 -webkit-border-radius: 999px;
 -moz-border-radius: 999px;
 border-radius: 999px;
}

.avatar-image-container{
 border:3px solid #fff !important;
 -webkit-box-shadow: 0 1px 2px #BBB;
 -moz-box-shadow: 0 1px 2px #BBB;
 box-shadow: 0 1px 2px #BBB;
}

As time is very easy, I hope this little trick pleases you and use it.
Enhanced by Zemanta

Elegant subscription Widget for Blogger


blogger widgets
Hi! While surfing the web I found this subscription widget that looks very stylish for our blog.
I will explain how to add this subscription box for blogger with social icons.hope.
Using this, users can subscribe to your blog. So, help you get the new updates by email. This Widget CSS.

Let's put on our blog .........

1. As usual we will Design >> Add a Gadget >> HTML / JavaScript.
Then add this code:

<style>
#sidebar-subscribe-box{width:300px;border:1px solid #aaa;border-radius:3px;padding:3px 0}
 .sidebar-subscribe-box-wrapper{background:url(https://blogger.googleusercontent.com/img/b/R29vZ2xl/AVvXsEgMmyTDgtOdL8IgOorVRKUMpnod-72KBvlso9tZ50-7hyphenhyphenQWZFhm_wY_al0TRnHiWG5dz2_ZVDNkY8YuMgNEMzkayJytj11ElvUG-inGHfXNUx-0pqkjMEFqBi0RCdPzSR2-i7ENheGo4J0/s1600/background.png) repeat scroll 0 0 #f7f7f7;color:#111;font-size:14px;line-height:20px;padding:1px 20px 10px;text-align:center;text-transform:uppercase}
 .sidebar-subscribe-box-form{clear:both;display:block;margin:10px 0}form.sidebar-subscribe-box-form{clear:both;display:block;margin:10px 0 0;width:auto}
 .sidebar-subscribe-box-email-field{-moz-border-radius:4px;-webkit-border-radius:4px;background:#fff url(https://blogger.googleusercontent.com/img/b/R29vZ2xl/AVvXsEiqhzMuzuSmy9L6qiCj0vZR2ud3ffZleTCUUyf2IJegjQ1sl5Qov1FHFIsTXw_zxLnjTyvCJqSmXN7uZTn189PuMtBhk1istSRxbwf886sgQh9qTjVs3rKFWTRaDAJw1M80EPkeCBVRoO4/s1600/icons.png) no-repeat 0 -27px;border:1px solid #ccc;border-radius:4px;color:#444;margin:0 0 15px;padding:10px 40px;width:68%}
 .sidebar-subscribe-box-email-button{background:#09f;border:1px solid #007fff;box-shadow:0 1px 0 rgba(255,255,255,0.3) inset, 0 1px 0 transparent;color:#fff;cursor:pointer;font-family:verdana;font-weight:700;padding:10px;text-shadow:1px 1px 0 rgba(0,0,0,.4);text-transform:uppercase;width:100%}
 .sidebar-subscribe-box-email-button:hover,.sidebar-subscribe-box-email-button:focus{background:#1ca4ff}
 .sidebar-subscribe-box-email-button:active{-moz-box-shadow:0 1px 4px rgba(0,0,0,0.5) inset;-webkit-box-shadow:0 1px 4px rgba(0,0,0,0.5) inset;box-shadow:0 1px 4px rgba(0,0,0,0.5) inset;outline:0}iframe,object,embed,.yt-border iframe,.yt-border object,.yt-border embed,table{width:100%}embed{border-radius:3px;-moz-box-shadow:0 2px 4px rgba(0,0,0,0.2);-webkit-box-shadow:0 2px 4px rgba(0,0,0,0.2);background:#FFF;border:1px solid #ddd;box-shadow:0 2px 4px rgba(0,0,0,0.2);margin:0;padding:4px 4px 4px}
 #footer-section{border-top:1px solid #aaa;box-shadow:inset 0 4px 6px -3px #aaa;font-family:cambria;font-size:14px;height:100px;margin:10px -30px 5px;padding:0 30px;text-align:center;width:100%}
a.social-icons{margin-right: 5px;height:45px;width:45px;}
a.social-icons:hover { opacity: .7; filter:alpha(opacity=70);}
</style>
<div id="sidebar-subscribe-box">
<div class="sidebar-subscribe-box-wrapper">
    <br/>
<a class="social-icons" href="https://facebook.com/my_page"><img src="https://blogger.googleusercontent.com/img/b/R29vZ2xl/AVvXsEgPZfnYo1VFGaCykq185tgoKm-gjIxjBQGml9VjFLwkj5PiVWfaGUh-2Snxq4b70tWuz_RIOTukHhuyKEG5ubctMqsNiXCVVomJ-a2kkM19Xdqa6r-NJRA-NLeDvRWa2jjS3d1J_kaKG5m1/s1600/Bloggertrix-facebook.png" /></a><a class="social-icons" href="https://twitter.com/my_user"><img src="https://blogger.googleusercontent.com/img/b/R29vZ2xl/AVvXsEhK92_sL91bURJks3y2YAPoxzv4clutke3TKzQutMSj7cO5nuC5GhniYFmSHnza5d6xXm_IhY2rzSlAwKpSmNs6lkf5mAwaCH2sK0QkYgu2t_SUxi4ZP1_RBAhardvdWM6A6xNfZ3pAPQKV/s1600/bloggertrix-twitter.png" /></a><a class="social-icons" href="https://plus.google.com/mi_User"><img src="https://blogger.googleusercontent.com/img/b/R29vZ2xl/AVvXsEgrF3jp91jXnrOdRbIuMuJ0Pi8FqUCaBsnp4H44e4LLhSHlh6sG9CfBYj03V5vZAaBqDw_do6k9K4qUbQBEGLemJOr_v8jCxaWCQ1x205aYDK8dX9su2p0PdkT7WHt8oCRglL34aIdZaF_q/s1600/Bloggertrix-Googleplus.png" /></a><a class="social-icons" href="http://www.feedburner.com/my_feed_id"><img src="https://blogger.googleusercontent.com/img/b/R29vZ2xl/AVvXsEipVIscG5-vJg8jj00vvNHc2H7W-kefZTCGuNJ8_qJo3X14UzRirfPb9AYF2LSAobql3U-uu62yf8lY31_9UBLBLRDpWHqtUGwZeVE9C9MUF0wI_jX5ZpVfTMDXCQxOq0KAa7BMtNmtmfep/s1600/Bloggertrix-Rss.png" /></a><p>Subscribe To Our Email Newsletter & Receive Updates Free</p>
<div class="sidebar-subscribe-box-form"><form action="http://feedburner.google.com/fb/a/mailverify?uri=id_Feed" class="sidebar-subscribe-box-form" method="post" onsubmit="window.open('http://feedburner.google.com/fb/a/mailverify?uri=your_id_Feedburner', 'popupwindow', 'scrollbars=yes,width=550,height=520');return true" target="popupwindow"><input name="uri" type="hidden" value="bloggertrix" /><input name="loc" type="hidden" value="en_US" /><input class="sidebar-subscribe-box-email-field" name="email" autocomplete="off" placeholder="Enter your email address here"/><input class="sidebar-subscribe-box-email-button" title="" type="submit" value="Subscribe Now !" /></form>
</div></div></div>

Two. Replaces everything was blue and ready for your data.

- You can change where it says: Enter your email address here for what you want.
Enhanced by Zemanta

Tuesday, April 30, 2013

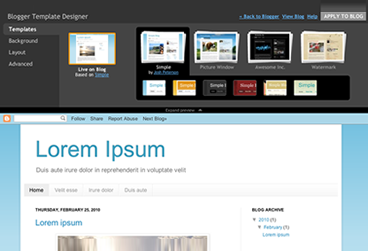
Blogger Template Designer

Time to talk about the overall design of your blog. At this point there are two ways, using the template designer blogger or incorporate a predesigned template ...

The truth is that before the appearance of the template designer blogger (March 2010) was practically mandatory search a predesigned template for blog, which would allow us to identify quickly.

First thing we do is to analyze the different elements that form part of the structure of our blog.

Blogger Template Designer     The General Fund blog. It can be a color or an image
     Header. It can be a text, an image or a combination of both. Remember that there is a Gadget to configure this section.
     Menu links or pages. Typically located after the header. Allows navigation through the blog and its pages. Remember you can create up to 10 pages for example to a web form, a guestbook, etc..
     The body. Formed by a zone where entries are posted and usually a vertical zone to the right of the entrance.
     The foot. It can consist of several blocks and will be positioned below the body of the blog

Then there are other elements such as typeface, etc.. All these aspects can be configured directly from the designer templates. With the added advantage that you can change on the fly any of these items, including the structure of the body (1 columa, 2 columns) foot or blog

For your reference, this blog has been improved using the blogger template designer. Everything you see, including the font were selected using this tool.

Here you have the video you used Google to announce this news (English)


Remember to start using the latest in Blogger before it is available to all users can access the administrator using http://blogger.com http://draft.blogger.com instead. Once you have accessed through draft will ask if you want to use as default desktop draft.

Obviously my recommendation is that you use the built-in template designer blogger (design tab). If after watching the video and try the tool does not stay convinced read on.

Free Templates for blogger:
The other alternative is to get a custom template based on the topic you are looking for then adapting tender. There are a variety of sites that offer free blogger templates. All these templates into account the different elements of the structure mentioned above.
Once you choose your template should incorporate through the Design tab and then Editor HTML. Press the Select Template button to load the XML file previously downloaded from any of the following sites:

Enhanced by Zemanta

Tuesday, April 2, 2013

Hover Effects to Your Blogger Blog Images

Add  different effects to those photos.The COOL thing about this is you just have to add some jQuery and Css to your template then you can easily add from Five hover effects to add some live to your blog photos.

Lets look through the effects and you can also check out this sample in action here.

The 5 effects will be :

Effect 1 - Popout, this is a basic pop out effect on hover the photos will pop out from the page.
Effect 2 - SliceDown, The image will have an dark overlay and on hover a slice effect reveals the image clearly.
Effect 3 - BoxRandom, The image has a light overlay and on hover the image is revealed by boxes randomly clearing.
Effect 4 - FoldLeft, Once again the image has a light overlay and this time on hover an accordion fold effect reveals the image.
Effect 5 - RainGrowReverse, This time on hover the image is revealed from corner to corner.


Add The PICS Effects To YOUR Blogger

Note:Remember Always Back Up Your Template Before You Make Changes - How To Back Up A Blogger Template

Step 1. In Your (New Design) Blogger Dashboard- Click The Drop Down Menu For Your Blog > Choose Template > Then Edit Html >

Step 2. Find this piece of code in your blogs Html : (Click Ctrl and F for a search bar to help find the code - How To Find Code In Blogger Template Template)

    </head>


Step 3. Copy and Paste the following code Directly Above / Before </head>
---------------------------------------------------------------------------------------------------------------------
    <script src='http://code.jquery.com/jquery-1.7.1.min.js' type='text/javascript'/>
    <script src='http://yourjavascript.com/143237963/jquery.adipoli.min.js' type='text/javascript'/>
    <script type='text/javascript'>
    /*<![CDATA[*/
    jQuery(function($pice){
    $pice('.effect1').adipoli({
    'startEffect' : 'normal',
    'hoverEffect' : 'popout'
    });
    $pice('.effect2').adipoli({
    'startEffect' : 'overlay',
    'hoverEffect' : 'sliceDown'
    });
    $pice('.effect3').adipoli({
    'startEffect' : 'transparent',
    'hoverEffect' : 'boxRandom'
    });
    $pice('.effect4').adipoli({
    'startEffect' : 'overlay',
    'hoverEffect' : 'foldLeft'
    });
    $pice('.effect5').adipoli({
    'startEffect' : 'transparent',
    'hoverEffect' : 'boxRainGrowReverse'
    });

    });
    /*]]>*/

    </script>

Step 4. Find the following piece of code in your blogs Html : (Click Ctrl and F for a search bar to help find the code - How To Find Code In Blogger Template Template)

    ]]></b:skin>


Step 5. Now Copy And Paste This Code Directly Above / Before ]]></b:skin>

    .adipoli-wrapper{position:relative;display:inline-block;margin:auto}
    .adipoli-slice{display:block;position:absolute;z-index:0;height:100%}
    .adipoli-box{display:block;position:absolute;z-index:0}
    .post img{border:0!important;margin:0!important;padding:0!important}
    .adipoli-wrapper>img,.adipoli-before,.adipoli-after{position:absolute;z-index:0}


Step 6. Save your template.

How to Add The Effect To Your Pics

Now we need to add a class tag to pics we want the effect on.So as you seen them on the demo ; if you want to use Effect 1 you add class="effect1" for Effect 2 you add class="effect2" and so on.Below I show were to add this class tag on your pics.

Then if your upload the pics or images directly onto Blogger we have an easy way to add the class.The code below is how the html for an image looks when uploaded to Blogger.

Important - This is when you upload the image in compose mode then switch to html mode.

    <div class="separator" style="clear: both; text-align: center;">
    <a href="https://blogger.googleusercontent.com/img/b/R29vZ2xl/AVvXsEhTspqHJ7VFYX65NEe_ZksRAZ5AaXH-DFXtijn8jEYjisgyQON8ref5VlcY-yFzol_nfQzanSKSPrV3iQS0pBptd6D0IyorWh36L8sVE5K_FOFR44ZWTr49d1YG_afsbG1vHSrf5vG2YxAb/s1600/image-effects-image-2.png" imageanchor="1" style="margin-left: 1em; margin-right: 1em;"><img border="0" src="https://blogger.googleusercontent.com/img/b/R29vZ2xl/AVvXsEhTspqHJ7VFYX65NEe_ZksRAZ5AaXH-DFXtijn8jEYjisgyQON8ref5VlcY-yFzol_nfQzanSKSPrV3iQS0pBptd6D0IyorWh36L8sVE5K_FOFR44ZWTr49d1YG_afsbG1vHSrf5vG2YxAb/s1600/image-effects-image-2.png" /></a></div>


You can see highlighted div class="separator" we change this to div class="effect1" (or effect2 etc..) like this below :

    <div class="effect1" style="clear: both; text-align: center;">
    <a href="https://blogger.googleusercontent.com/img/b/R29vZ2xl/AVvXsEhTspqHJ7VFYX65NEe_ZksRAZ5AaXH-DFXtijn8jEYjisgyQON8ref5VlcY-yFzol_nfQzanSKSPrV3iQS0pBptd6D0IyorWh36L8sVE5K_FOFR44ZWTr49d1YG_afsbG1vHSrf5vG2YxAb/s1600/image-effects-image-2.png" imageanchor="1" style="margin-left: 1em; margin-right: 1em;"><img border="0" src="https://blogger.googleusercontent.com/img/b/R29vZ2xl/AVvXsEhTspqHJ7VFYX65NEe_ZksRAZ5AaXH-DFXtijn8jEYjisgyQON8ref5VlcY-yFzol_nfQzanSKSPrV3iQS0pBptd6D0IyorWh36L8sVE5K_FOFR44ZWTr49d1YG_afsbG1vHSrf5vG2YxAb/s1600/image-effects-image-2.png" /></a></div>


When you add pics or images in html mode or adding externally hosted images your image code will be like this :

    <a href="https://blogger.googleusercontent.com/img/b/R29vZ2xl/AVvXsEhTspqHJ7VFYX65NEe_ZksRAZ5AaXH-DFXtijn8jEYjisgyQON8ref5VlcY-yFzol_nfQzanSKSPrV3iQS0pBptd6D0IyorWh36L8sVE5K_FOFR44ZWTr49d1YG_afsbG1vHSrf5vG2YxAb/s1600/image-effects-image-2.png"><img src="https://blogger.googleusercontent.com/img/b/R29vZ2xl/AVvXsEhTspqHJ7VFYX65NEe_ZksRAZ5AaXH-DFXtijn8jEYjisgyQON8ref5VlcY-yFzol_nfQzanSKSPrV3iQS0pBptd6D0IyorWh36L8sVE5K_FOFR44ZWTr49d1YG_afsbG1vHSrf5vG2YxAb/s1600/image-effects-image-2.png" /></a>


We add the class as shown below :

    <a href="https://blogger.googleusercontent.com/img/b/R29vZ2xl/AVvXsEhTspqHJ7VFYX65NEe_ZksRAZ5AaXH-DFXtijn8jEYjisgyQON8ref5VlcY-yFzol_nfQzanSKSPrV3iQS0pBptd6D0IyorWh36L8sVE5K_FOFR44ZWTr49d1YG_afsbG1vHSrf5vG2YxAb/s1600/image-effects-image-2.png"><img class="effect1" src="https://blogger.googleusercontent.com/img/b/R29vZ2xl/AVvXsEhTspqHJ7VFYX65NEe_ZksRAZ5AaXH-DFXtijn8jEYjisgyQON8ref5VlcY-yFzol_nfQzanSKSPrV3iQS0pBptd6D0IyorWh36L8sVE5K_FOFR44ZWTr49d1YG_afsbG1vHSrf5vG2YxAb/s1600/image-effects-image-2.png" /></a>


For this we used the idea from the Adipoli jQuery Image Hover Plugin.
Enhanced by Zemanta

Saturday, March 30, 2013

The Trick to Change Image On Blogger

How to make an image clickable?

The complete clickable image code looks like this,
<a href="LANDING URL" target="_blank">Image LINK" width="" height=""  alt=""  title="" border="0" /></a>


  • Where refers to where will the image take the user when it is clicked.
  • Where IMAGE LINK refers to the URL of your picture
  • width="" and height="" has to be given proper values in pixels
  • alt="" is alternative text tag that you right to tell search engine robots what the image is about
  • title="" is the name of the image that appears on mouse hover. It is always kept the same as the alt=""
  • border="0" ensures that no border or outline appears across the image
For example for the image below I have used the following code,
<a href="http://tricksblogspot.blogspot.com/" target="_blank"><img src="IMAGE LINK" width="240px" height="180px"  alt="Clickable Horse image" title="Clickable Horse image" border="0" /></a>


When you click the image, it will take you to our homepage. Else if you want to link to the original size of image then use this code,


<a href="IMAGE LINK" target="_blank"><img src="IMAGE LINK" width="240px" height="180px"  alt="Clickable Horse image" title="Clickable Horse image" border="0" /></a>
Clicking the image below will show you its original size.
world globe


How to make the same image un-clickable?

To make any image un-clickable simply remove the href linking tag. After removing the landing address tag we get,
<img src="IMAGE LINK" width="" height=""  alt=""  title="" border="0" />
You will see that the image is no more clickable. and the code I used this time is the same one but without the href tag,
<img src="IMAGE LINK" width="240px" height="180px"  alt="unclickable Horse image" title="unclickable Horse image" border="0" />


unclickable Koala image


How to make an image fade in and fade out?

For this you will need to add a tiny CSS3 code to your template. So kindly follow these steps,
  1. Go To Blogger> Design > Edit HTML
  2. Backup your template
  3. Search for ]]></b:skin>
  4. Add the code below just above it


/*---MBT FADE OUT CODE ----*/
.Fadeout img {
filter:alpha(opacity=100);
opacity: 0.3;
border:0;
}
.Fadeout:hover img {
filter:alpha(opacity=30);
opacity:1.0;
border:0;
}
/*---MBT FADE IN CODE ----*/
.Fadein img {
filter:alpha(opacity=30);
opacity: 1.0;
border:0;
}
.Fadein:hover img {
filter:alpha(opacity=100);
opacity:0.3;
border:0;
}


    5.  Save your template.


Now whenever you wish to add the fading effect to your image then simply insert an additional code to the same Clickable image code that we discussed above.
To make the image Fade out simply insert class="Fadeout" to your image code like this,
<a class="Fadeout" href="LANDING URL" target="_blank"><img src="IMAGE LINK" width="" height=""  alt=""  title="" border="0" /></a>

See an example below. (Hover your mouse cursor on it)


To make the image Fade in simply insert class="Fadein" to your image code like this,
<a class="Fadein" href="LANDING URL" target="_blank"><img src="IMAGE LINK" width="" height=""  alt=""  title="" border="0" /></a>

See an example,


I hope you find it useful. If you wanted to know where to save your images or to get IMAGE Links then read this post,
Enhanced by Zemanta

Botones Isometricos de Social Media


Barra Lateral Fija